
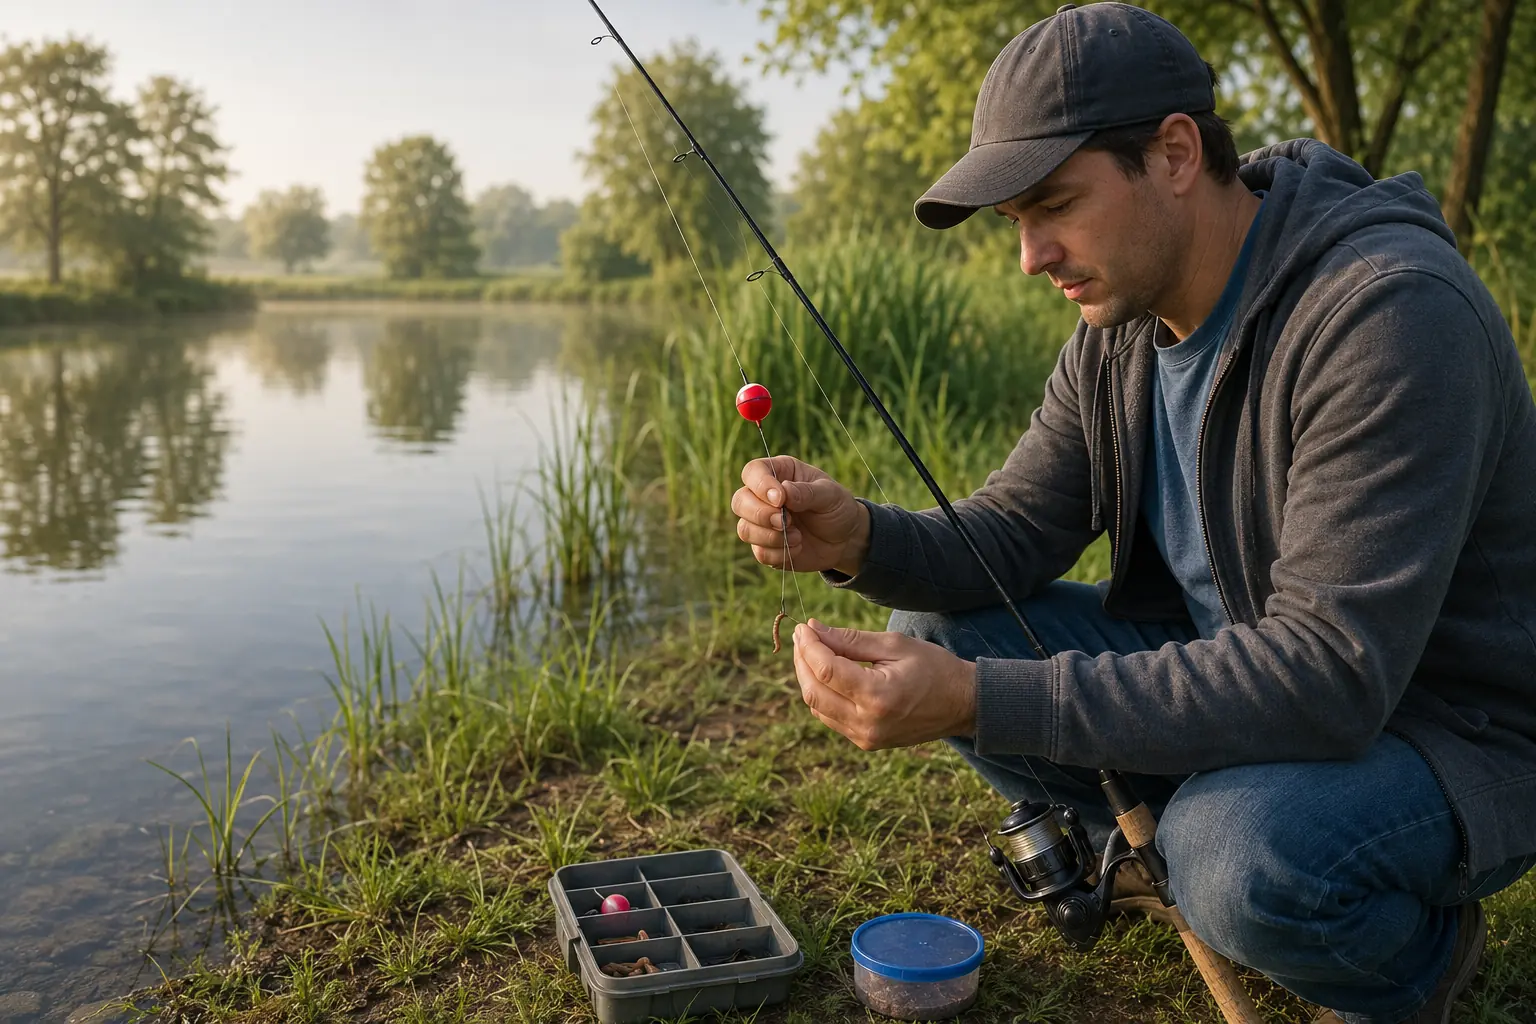
A worm under a bobber is one of the most useful first fishing setups because every part has a clear job. The bobber controls depth and shows a bite. The split shot helps the bait sink. The hook holds a small piece of worm where bluegill, perch, stocked trout, and other freshwater fish can find it.
The setup is simple, but small adjustments matter. A bobber that is too large can hide light bites. Too much weight can make the rig awkward. A whole nightcrawler on a large hook may be more bait than a small fish can take. This guide starts with a practical fixed-bobber rig and shows exactly what to change when it is not working.
Affiliate disclosure: As an Amazon Associate I earn from qualifying purchases. A few optional gear links below help beginners compare basic tackle at no extra cost to you.
The Quick Bobber-and-Worm Rig
For a common shallow-water starting setup, arrange the line in this order from the rod tip toward the bait:
- Fixed bobberStart 18 to 36 inches above the hook.
- Small split shotPlace it 6 to 12 inches above the hook.
- Small bait hookSizes 6 to 10 cover many beginner situations.
- Worm pieceUse about 1 to 2 inches and leave the point exposed.
Those measurements are starting points, not rules for every lake. The right depth and hook size depend on the fish, water depth, cover, current, bait restrictions, and how the fish are feeding that day.
What You Need
- A light, medium-light, or medium spinning or spincast rod-and-reel combo
- Four- to 8-pound monofilament line for many panfish and stocked-trout situations
- A small fixed bobber that the bait and weight can pull upright
- One small lead-free split shot
- A size 6, 8, or 10 bait hook
- A nightcrawler or garden worm where natural bait is legal
- Fishing forceps or needle-nose pliers and line clippers
If your reel already has usable line, do not replace it just to match a list. Check it for severe memory coils, fraying, sun damage, and weak knots. The FFO Beginner Fishing Gear guide explains the full starter setup without requiring a large purchase.
Fixed Bobber or Slip Bobber?
Start with a fixed bobber
A fixed bobber clips directly to the line. It is fast to rig, easy to understand, and well suited to shallow ponds, docks, weed edges, and short casts. Its practical limit is depth: trying to cast with six feet of line hanging below a six-foot rod quickly becomes awkward.
Use a slip bobber when the water is deeper
A slip bobber slides on the line during the cast and stops at a small bobber stop. It allows a bait to fish deeper than the rod is long while remaining easy to cast. It is an excellent next step, but a beginner must also learn the stop, bead, and sliding-float sequence. For the first lesson, a fixed bobber usually keeps the setup clearer.
How to Rig a Bobber and Worm Step by Step
1. Tie on the hook
Tie a size 6 to 10 bait hook directly to the line with a knot you can inspect and repeat. The improved clinch knot is a common starting choice for monofilament. Moisten the knot, pull it down evenly, and leave a short tag end after trimming.
Use the smaller end of the range for bluegill and small bait pieces. A size 6 or 8 can make more sense for a larger worm piece, stocked trout, perch, or fish with a slightly larger mouth. Hook numbering is not perfectly identical across every brand and style, so compare the hook to the bait instead of relying on the number alone.
2. Add one small split shot
Pinch one small split shot about 6 to 12 inches above the hook. Use purpose-built fishing pliers when possible and avoid crushing the line. The shot should help the worm sink and help the bobber sit correctly without dragging the entire float under.
If the bobber lies flat, the rig may need a little more weight—or the weight may be resting on the bottom. If the bobber barely stays above water, remove weight or use a slightly larger float. Start light. You can always add one small shot.
3. Attach the fixed bobber
Attach the bobber about 18 to 36 inches above the hook, following the float manufacturer's clip design. Start near 24 inches for a shallow bank or pond edge. The goal is to suspend the worm above weeds, mud, rocks, or other bottom cover—not automatically to place it on the bottom.
If the water is only two feet deep, a three-foot setting will put the split shot or bait on the bottom and may leave the bobber lying sideways. If the water is much deeper and fish are holding below the bait, move the bobber farther from the hook in 6- to 12-inch steps.
4. Put a small piece of worm on the hook
Pinch or cut a 1- to 2-inch section of worm. Pierce it through two or three points so it stays on during the cast, but leave a short end free to move. Keep the hook point exposed. A tightly packed ball of worm can hide the point and make it harder to hook a fish.
Use a smaller piece when small panfish keep pecking without taking the hook. Replace the bait when it becomes washed out, torn, or missing. Never release unused worms onto the ground at the fishing site; dispose of them properly so you do not spread nonnative species.
5. Make a smooth cast
Look behind and beside you before every cast. Use a smooth motion and let the bobber and split shot carry the rig. Snapping the rod hard can throw the worm off or tangle the leader around the float.
Cast beside a weed edge, dock, shaded bank, downed tree, inlet, or visible depth change while leaving enough room to avoid a snag. Close the bail if you are using a spinning reel, then reel just enough line to remove a large bow. Do not pull the bobber toward you continuously.
6. Watch the bobber and set the hook
A fish does not always pull a bobber straight under. The float may twitch, slide sideways, tip over, stop drifting, or rise higher when a fish lifts the split shot. One movement can be wind or a wave. Repeated movement or a steady pull deserves attention.
When the bite looks committed, reel in loose line and make a smooth upward sweep of the rod. A violent hook set can pull a small hook away from the fish or send the rig flying back toward you.
How to Set the Right Bobber Depth
Depth is the main adjustment in bobber fishing. Begin with the hook 18 to 24 inches below the float in shallow water. If the bait is untouched after several good casts, change the depth by 6 to 12 inches rather than moving the bobber several feet at once.
| What you see | What it may mean | Simple adjustment |
|---|---|---|
| Bobber lies flat | The weight or bait may be resting on bottom, or the rig lacks enough weight to stand the float. | Try a shallower setting first; then add only a small amount of weight if needed. |
| Bobber stands normally but bait returns untouched | Fish may be at another depth or location. | Move the bobber 6 to 12 inches, or cast to the next piece of cover. |
| Bobber twitches but never goes under | Small fish may be pecking at too much bait. | Use a smaller worm piece and possibly a smaller hook. |
| Bobber sinks without a bite | The float may be too small for the split shot, current, or bait. | Remove weight or use the next slightly larger bobber. |
| Rig tangles during the cast | The cast may be too sharp, or the leader below the bobber may be too long. | Use a smoother cast and shorten the starting depth. |
Where to Cast a Bobber and Worm
From the bank, start close. Fish often use shoreline cover that new anglers try to cast past. Make controlled casts along:
- The outside edge of weeds rather than deep into them
- Docks, pilings, and shaded bank sections
- Small points or changes from gravel to mud
- Inlets where moving water brings oxygen and food
- The edge of a visible drop-off
Give a productive-looking spot several casts at two or three depths. If the bait remains untouched, move a short distance and repeat. The Western State Fishing Location Guides can help you choose a manageable destination, and the on-site FFO fishing location directory can help identify public-water options. Always verify current access and regulations through the responsible agency.
Common Bobber-and-Worm Mistakes
- Using a bobber that is too large: A large float can hide light bites. Use the smallest one that supports the bait and weight.
- Adding too much split shot: Extra weight does not automatically improve casting and can pull the float under.
- Covering the hook point: Leave the point exposed so it can connect.
- Using the whole nightcrawler: A smaller piece is often easier for panfish to take and wastes less bait.
- Ignoring depth: The bait can look perfect while hanging above or below the fish.
- Holding too much slack: Excess loose line delays the hook set and makes bite control harder.
- Casting repeatedly without a plan: Change one variable—depth, location, bait size, or float size—then observe the result.
Landing and Handling the Fish
Keep steady pressure on the fish and let the rod bend. Loosen the drag if the line feels close to breaking. For a small fish near shore, guide it into wet hands or a rubber-coated net instead of dragging it over dry dirt and rocks.
Wet your hands before touching a fish, support it horizontally, keep fingers away from gills, and use forceps to remove the hook. If you plan to release it, keep it in the water as much as possible and make any necessary air exposure brief. Cut the line when a deeply embedded hook cannot be removed quickly without causing more damage.
Check the Rules Before Using Worms
Natural bait is not legal on every water. Special trout waters may restrict bait, hooks, seasons, or harvest. License requirements also vary by state, age, residency, and location. Check the current rules for the exact water before fishing, and obey posted signs and emergency closures.
The U.S. Fish and Wildlife Service license directory can point you to the correct state agency. For Idaho waters, begin with the current Idaho Fish and Game fishing rules.
Bobber-and-Worm FAQ
How far should a bobber be from the hook?
Start around 18 to 36 inches for a fixed-bobber rig in shallow water. Move the bobber in 6- to 12-inch steps until the bait is just above the bottom or at the depth where fish are feeding.
How far should split shot be from the hook?
Six to 12 inches is a practical starting range. Keeping the shot away from the hook lets the worm move more naturally while still helping it sink.
How much worm should I put on the hook?
A 1- to 2-inch piece is often enough. Pierce it through two or three points and leave a short section free to move.
Why does my bobber keep falling sideways?
The bait or split shot may be resting on the bottom, the bobber may be set too deep, or the rig may not have enough weight to stand that particular float upright. Try a shallower setting before adding weight.
When should I switch to a slip bobber?
Switch when the bait must fish deeper than you can comfortably cast with a fixed bobber. A slip bobber is especially useful around deeper docks, steep banks, and suspended fish.
Start Simple, Then Make One Adjustment
A bobber-and-worm rig works because it gives a beginner something clear to control: bait size, depth, location, and line slack. Rig it simply, make a smooth cast, and watch what the float tells you. If the fish do not respond, change one variable at a time.
For a complete troubleshooting order, read Why Fish Aren’t Biting: 8 Smart Changes to Try.
For the wider first-trip lesson, read Beginner Fishing: The Basics You Need to Get Started. If you need the complete shopping and packing list, use the Beginner Fishing Gear guide.